Showing posts with label Stampin Up. Show all posts

Sunday, September 27, 2020

October Club Sneak Peak Projects

My favorite projects to make are fall themed projects. They are a very close second to Christmas, but I like fall a bit better. I love the change in weather, the gratitude the season brings and the warm colors. I couldn't wait to create some sneak peak projects for my October Stamp Club. 

These projects feature 

 BEAUTIFUL AUTUMN BUNDLE (ENGLISH) 155189 $50.25                GILDED AUTUMN SPECIALTY DSP 153520 $15.00


WRAPPED IN TEXTURE EMBOSSING FOLDERS

153574 $8.00

PLAID TIDINGS 6" X 6" DS153527 $11.50


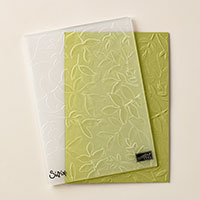
I think the combination of the embossing folders and the DSP (designer series paper) really made the cards pop. 

I have a few more projects to make and then I can start making my own sets to gift. Then I can start bringing out the fall decor to go with it!  


Monday, August 3, 2020

A Little Something with Fancy Phrases


I think this has got to be my favorite layout. A simple card with dsp (designer series paper) on one half and a greeting popped up cut with circle dies and a little scallop circle in the back. In fact, when looking at stamp sets I am often looking for greetings that will fit in circles! In fact to be honest, I liked this stamp set - Fancy Phrases- for the greetings. I didn't care for the floral image at first. However I found that it was perfect for a background stamp. 

Project Tips:
I wanted a monochromatic look for this card. So I first started by finding some designer series paper (dsp) in the color I wanted (and that matched cardstock I had). This piece is from the 
Playing With Patterns 6" X 6" (15.2 X 15.2 Cm) Designer Series Paper 152490 ($11.50)

PLAYING WITH PATTERNS 6" X 6" (15.2 X 15.2 CM) DESIGNER SERIES PAPER

To get the background, I stamped the same color of ink as the paper. This creates a watermark look, but a little darker than watermark. For this card I used Calypso Coral ink and cardstock. Then I found circles and scallops that fit my greeting using the 
Circles Dies $35.00 (151770)

LAYERING CIRCLES DIES


Let me know what you think of this project! To order products, go to mayramt.stampinup.net 

Celebrate Sunflowers Class Projects


Even though the kids will be back in school soon, it is still feels like we are deep in summer. Personally, I am savoring the last few days (for me) and weeks (for the kids) of summer vacation. These projects were the first thing I wanted to create when the new catalog was released. To me, these sunflowers were screaming summer. I loved stamp sets that feature a large stamp or image that make it easy to create beautiful cards with minimal effort. 

These were some fun summer projects that I created for a Stampin' Bingo I hosted online late June. My class featured a class price and materials all cut up and prepared for everyone shipped to their home. Then we all gathered online at a set date/time and created the projects together. For this class we also played bingo, so that was extra fun! I have missed my live class gatherings so online is the next best thing. 

Would you like participate in a stamp class with your friends? Contact me and I can create this class for you or another in a theme of your choice. 

Project Details:
I wanted to feature one stamp set, that you could make several projects with minimal materials. These projects feature 
  • Celebrate Sunflowers Bundle (stamps and dies) - 154065 - $51.25
  • 2020–2022 In Color 6" X 6" designer series paper - 153070- $11.50
  • Early Espresso Classic Stampin' Pad - 147114- $7.50
  • Daffodil Delight Stampin' Blends Combo Pack - 154883- $9.00
CELEBRATE SUNFLOWERS BUNDLE (ENGLISH)
The cardstock colors used in the cards are Bumble Bee, Daffodil Delight, Just Jade, Early Espresso, Bashful Blue, Misty Moonlight. 


In this project (above), I stamped the sunflowers in early espresso and colored in the sunflowers with the blender pens. I am not great at the shading, so I stick to just one shade at a time!


This one featured the classic sunflower colors. For the flower I used Bumble Bee for the outer flower and Daffodil Delight for the back piece. I also stepped up the card base by texturing with an embossing folder.


This one was my favorite. I stamped the small sunflower image on a scrap paper and cut it out. I don't mind a little cutting! Then I layered it with a little dsp (designer series paper) and added my favorite linen thread. I go through packages of this stuff and add it to I would say half of my projects.


This could easily be a one layer card if you want to omit the linen thread.  That was my intention, but then I messed up on the greeting, so I added a greeting on dimensionals to hide it. 


Now this was my favorite! I love the misty moonlight and bumble bee color combination. I realize that sunflowers are not usually blue, but I love the way it looks! 

To order these products, go to mayramt.stampinup.net or contact me with questions!

Sunday, July 28, 2019

Magnolia Blooms Kits


Last month I hosted a Stampin' Bingo Night. It was so much fun. We made the make and take projects above, played bingo for stampin' prizes and had a great time. These cards were such a hit I thought I would share the kit with you TO GO. I have bundled kits for you to make on your own. Plus, you can add extra kits to invite some friends over!

Here are your options:

Magnolia Blooms ALL INCLUSIVE DIY Kit
  • Magnolia Blooms Stamp Set
  • Mossy Meadow Stampin' Pad (aka ink pad)$2
  • Starter Acrylic Block
  • Snail Adhesive
  • 1 sheet of dimensionals
  • A kit with materials to make 12 (4 of each design)
  • $52 for pick up/meet up (add $6 to ship to)
Magnolia Blooms BASICS DIY Kit

  • Magnolia Blooms Stamp Set
  • Mossy Meadow Stampin' Pad (aka ink pad)
  • A kit with materials to make 12 (4 of each design)
  • $39 for pick up/meet up (add $6 to ship to)
Magnolia Blooms Card Set 
  • 12 finished cards ready for you to mail or use!
  • $22 (shipping or delivery included)

Need an extra DIY Kit: $12 for each additional kit

Please email me at mayramt@hotmail.com if you are interested! Here is a look at the Magnolia Blooms Stamp Set:


Monday, March 11, 2019

Some much needed Color Therapy


Today is my birthday.  This year I am doing something pretty rare and unusual for me.  I am taking a day off. Now, I've taken plenty of days off before.  However, today my plan is to really be off.  I am staying home today and doing nothing but things that I enjoy.  I made sure to tidy up yesterday so that today I could just relax, stamp, scrapbook and catch up on some movies or new netflix shows. I guess it sounds pretty simple, but I think a lot of us can relate to not taking much time for ourselves. So Starbucks in hand, I am looking forward to today ;)

Now although a day off is a luxury I don't usually take, I do make it a point to have some fun, girl time every month.  When my second daughter was 1, I realized that I needed an outlet.  I wanted to do something that was fun and relaxing.  That is when I discovered Stampin' Up! A friend of mine was a Stampin' Up! demonstrator and I decided to buy the Stampin' Up! Starter Kit so that I could get a discount on stamps.  That was my only intention with SU. But then I had some friends over to make cards and had the best time.  Even my friend Sarah that was very clear in saying, "I don't like this stuff, but I am here for you, " had a great time.  It was so much fun to chat, have some snacks and make pretty things.  I then created a Stamp Club where a group of us would meet monthly.  I prepare our projects, they bring the food.  We all looked forward to it every month. In fact, we call it stamp therapy.  I truly feel that the monthly gathering is good for the soul and a nice recharge. Fast forward, 10 years later, I still host the same monthly club and I added an extra monthly class. 

Last month, we had a little color therapy in our club projects.  I never used to enjoy coloring, but lately, I love it! At club, it was so relaxing to color.  I also prepped some extra pieces so last Friday at our Sip and Stamp class, I was coloring away making extra sets. I now understand all of the adult coloring books I have been seeing.  Now, while that is a bit too much coloring for me.  This Birthday Statements is perfect for me. I can easily stamp the image and color.  I fancied up the cardstock with some embossing folders, but even with out it it looked great.  


I used stampin write markers with this card (above).  I think that was my favorite. 

This one I did with watercolor pencils.  

So if you are looking for a fun and easy way to make cards, or spend some much needed girl time with fun projects, these are perfect. Below you can see the materials I used, or you can modify with what you have or your own favorite colors. 

If you'd like to learn more about the Starter Kit, click HERE.  It is a no obligation, way to get lots of products, and enjoy a stampin' up! discount.  Now until March 31st, the Starter Kit includes more products for the same flat rate and even a travel bag option. 

If you'd like to host your own stamp class or have me prep a TO GO class for you and some friends, email me at mayramt @hotmail.com (no space).  

Okay, off to enjoy the rest of my day!  

- Mayra

Products used in the projects above:

Saturday, February 28, 2015

SAB: Lotus Blossom


Last month at Stamp Club we made this simple card, using the Sale-A-Bration stamp set, Lotus Blossom.  I think it is a very simple card, but love the way it turned out.  This was the first stamp set on my wish list when the SAB brochure was released.  I can imagine making lots of these in no time, or making a quick card that looks elegant with little details.  You can't really see it in the photo but the flower has lots of detail from the 3 step stamping that was put into it.  

What is your favorite SAB item this year?

Tuesday, August 12, 2014

Back to School Treats


Hello,
 
Can you believe summer is almost over ?!  It is definitely bitter sweet for me.  I love the flexibility of summer and the slower mornings and days.  At the same time I like structure and routines.  Either way, I will miss my girls company as they transition back in. 
 
Today I had a Back to School Mini Album Class and we made some bonus Back to School Treats.  It was a lot of fun playing with the Playground Project Life Card Collection and creating the cute little tags on the boxes above.  We just picked the cards we liked and used the 2 1/2 circle punch to punch them out.  Added those to some Tag a Bag Gift Boxes with a little ribbon and DSP and voila...cute little treat boxes.  I love, love, love the Tag a Bag Gift Boxes, they are inexpensive ($6.95 for 8!) and so easy.  I have used these for party favors, Halloween, Thanksgiving, Christmas, Easter.....every holiday!


The second treat we made was a rolo "pencil".  These are also simple and made with So Saffron cardstock, embossed with stripes and a touch of silver paper.  What do you think?! 
 
 
Enjoy the last of your summer!.....I can't wait for the holidays!  Contact me to schedule your Fall party or private class!
 
Mayra

Sunday, December 1, 2013

Cyber Monday/ Christmas Blitz #6: Be Merry


Cyber Monday Sales: The following items are 30% off Monday, Dec. 2 only!!
Envelope Liners Framelits Dies (item 132172)
Expressions Thinlits Dies (item 132171)
Holly Jolly Greetings Simply Sent (item 132159)
Snowflake Season Simply Sent  (item 132176)
Large Rhinestone Basic Jewels (item 129324)
Extra-Large Gift Box (item 132147)
 
Okay, now I am really in the Christmas mood!  Thanksgiving is done, we have our tree and I have started to take out the Christmas decorations!  Oh, and I also took a picture for our Christmas card.  I always do a handstamped card and add a photo for family and close friends.  So I had a great weekend.

I choose this Be Merry Card for today's post because it is one of my favorites so far this year.  I cased this card (or a similar version) from someone out in the SU blog world! You cannot see the details on the photo, but it is stamped and embossed in white (using the Be Merry single stamp).  I also added some burlap and ribbon for an extra dimension.  What do you think?

Have a great rest of your Sunday night! 

Mayra

Saturday, November 30, 2013

Christmas Blitz #5: Magic Wonder of the Season


Hello Again!

Here is another quick post (I hope to ressume to more details on Monday).  This card was created (and/or CASED) from my friend and fellow demo Alisha.  We made it at last Luv2Stamp Skype Meeting and Get together.  I love the font of the greeting (from the single stamps list) and message.  This weekend we will start our annual holiday traditions and the card seemed fitting for our special events (tree cutting, decorating...)

Have a great rest of the Thanksgiving weekend.

Mayra

Friday, November 29, 2013

Christmas Blitz #4: A Banner Christmas File Folder Card

Don't forget to check out Stampin' Up!'s Cyber Monday Sales.  Click here on Monday for the posts or come back to my blog for details.


I hope you all had a great Thanksgiving!  Mine was great, filled with good food (lots of food) and a little shopping.  I just realized that SU is going to have Cyber Monday sales, so I am glad I didn't shop too much to save room for hopefully some good sales!  Any guesses on what will be on the list?
Send me an email with a guess of an item you think will be on the Cyber Monday sales and if you are right you will get a 15% off 1 Item coupon from me.

So to the card, this is a quick post because I am still recovering from the holiday and trying to keep it short to go back to family time ;)  This card is another one of the trendy file folder cards created with the Envelope Punch Board.  They are very fun and easy to make.  Ask me if you want to find out how!  Other features on the card are the Season of Style DSP and washi tape 

Have a safe weekend.
Mayra

Wednesday, November 27, 2013

Christmas Blitz #3: Festive Flurry File Folder Card

Just a reminder....anyone placing an online order and using hostess code:
VCUYKSF3
will be entered in a raffle to win a Stampin' Up! grab bag valued at $50.  Orders must be placed between now and 12/24 on my website www.mayramt.stampinup.net
 
If you would like me to be Santa's helper and share your Stampin' Up! wish list with a family member or friend let me know.  I will enter you in the raffle with any assisted orders too ;)  Just let me know who to email your list and I'll take care of the rest!
 

Now to the project... This card was made with the Envelope Punch Board from Stampin' Up! I had ordered the Envelope Punch Board a little after it was released but I hadn't had a chance to make these very trendy and popular File Folder Cards....until this weekend.  I had a get together/meeting with some friends and Stampin' Up! Demos and one of them Jamie Garrett brought this card for our shoebox swap.  Isn't it pretty?!  Thanks Jamie!  This card features the Festive Flurry bundle too.   Contact me if you want to find out more about the Envelope Punch Board.  The original purpose is to make envelopes, but many talented demos have used it for so many other things.

Happy Stampin'
Mayra

Tuesday, November 26, 2013

Christmas Blitz #2: Sassy Salutations Merry Christmas

Before I share the project details....anyone placing an online order and using hostess code:
VCUYKSF3
will be entered in a raffle to win a Stampin' Up! grab bag valued at $50.  Orders must be placed between now and 12/24 on my website www.mayramt.stampinup.net
 
If you would like me to be Santa's helper and share your Stampin' Up! wish list with a family member or friend let me know.  I will enter you in the raffle with any assisted orders too ;)  Just let me know who to email your list and I'll take care of the rest!


Okay, to today's project.  My friend and upline Carrie created (or maybe CASED ;) this card for a get together/meeting we had this weekend.  I love her use of non-traditional colors and a funky stamp set.  Best of all, she had the project set up for us.  It is rare that I get to make projects prepped by others....it's really fun stamping when everything is set up for you!  I do that for my clubs and classes, but it is a treat when someone does it for me ;) 

This card is a great example of using your stamps for a variety of uses.  I have used the Mosaic Madness stamp set used in this card for birthday and thank you cards, but not for Christmas.  Here are the details:

Ink: Coastal Cabana
Stamps: Sassy Salutations (on the holiday sale...see details below), Mosaic Madness
Paper: Season of Style DSP pack, Whisper White, Coastal Cabana
Accessories: Rhinestones, Paper Piercer, Coastal Cabana ruffle stretch ribbon, Mosaic punch
------------------------------------------------------------------------------------------------------------------------

Sassy Salutations Clear-Mount Stamp Set
                                               
Sale Price Until 12/2: $12.57 (order # 126707 )

Monday, August 19, 2013

Truly Grateful Card

This was the second project we made at this weekend's Stampin Party at Kathy's.  Her special request was a fall project, so this is what I came up with.  I created a Quick and Cute card that gave a nice "wow", but was fairly easy to make. 

Here is the recipe:

Stamps: Truly Grateful, Gorgeous Grunge
Ink: Crushed Curry, Chocolate Chip, and Soft Suede
Paper: Crumb Cake, Tangerine Tango, Very Vanilla
Accessories: Natural Trim Ribbon

I received the Gorgeous Grunge stamp set for free at Convention.  Honestly, when I seen it in the catalog I didn't like it, but now I love it.  It is a great set to use in the background or in place of the spritzer for some splashes of colors.

Happy Monday!
Mayra

Sunday, August 18, 2013

Throw a Party #4: Sweet Celebration Scrapbook page

This Saturday I hosted a Stampin Party for my friend Kathy.  She is a major scrapper so she wanted one of our projects to be a scrapbook page.  Since I was still in birthday mode, I decided to do a birthday page.  I used the same colors and supplies from my birthday party projects so that I could use this project in my daughter's scrapbook. 

So here it is!  I created a simple layout that is easy to recreate with other themes or colors. 

Have a great Sunday night!
Mayra

Friday, August 16, 2013

Throw a Party #3: Build a Banner

Here is the banner I created for my daughter's birthday party.  I used the Build a Banner Kit from Stampin Up:

It is $19.95 and you can get the product details HERE.

Soooo... I had created a video for this post.  However, maybe the camera was not on when I filmed it?!  cause I could not find it on my video camera ;(  I will try to do another on a later date.

Here are some tips on doing this banner:
  • Use newspaper under your project (it can be a tad messy)
  • Fill up spritzer bottles  2/3 of the way with rubbing alcohol and add 9-10 drops of color of our choice from the SU reinkers
  • Test the color on a scratch paper first
  • Make sure your banner piece is the right side up (look at grommets)
  • Do not over spritz (it can smear if you do too much ink)
  • Allow yourself at least one tester banner, just in case you mess up like me :)
Overall it was REALLY easy...I just sprayed the ink with the spritzers and stencils in my color choices, added a little ribbon and done.  I did her name on the day of the party in the morning ( I ordered extra banners for her name $9.95 for extra banner pieces).

Have a great weekend and stamp something!

Mayra

Wednesday, August 14, 2013

Happy Back to School!

Happy Back to School!
Well all good things have to come to an end!  My girls had a blast this summer but there summer is coming to an end.  To kick of the year on a good note ;) , I made some chocolate favors to give to their teachers, old teachers, and other staff.  I used It's a Wrap Occasions stamp set. 

Happy Stampin'
Mayra

(PS.  It's retired ribbon, but I love it and couldn't help using it!)

Tuesday, August 13, 2013

Throw a Party #2: Tag a Bag Goodie Box

 
I think these are my ultimate favorite goodie boxes so far and easy and the most bang for my buck! 
 
They are the Tag a Bag Gift Boxes (130927/ $6.95 for 8.....that comes out to about $1 each with tax and shipping in my area). Okay to the details. 
 
Here is what the boxes look like plain:
 
 
They are a thick cardboard material with clear acetate sleeve. To dress them up I took a piece of cardstock and cut and scored it to fit inside (to match the invitation of course!).  Then I added DSP and punched out labels to give them a personal touch. I also added a dash of matching ribbons ;) They were easy to make and I think everyone loved them!  As for the inside, we had a candy buffet table so everyone got to stuff it with candy.
 
Here are the measurements:
 
Cardstock insert:  7 x 4 3/8 (score at 1 and 3 3/8 on short side)
Cardstock Layer: 6 7/8 x 2 1/2/
DSP layer: 6 5/8 x 2
 
Other tools used: 1 3/8 circle punch and scallop circle punch, SU ribbon


Friday, May 31, 2013

Quincenera Invitations

Hello!

This week I has an order for 75 Quincenera invitations. I used the dress up framelits for the big shot and came up (or cased I should say :) this.

Enjoy!

Mayra

Saturday, January 12, 2013

Sneak Peak

Here is a sneak peak at one of the projects my club members will be making at our Stamp Club this month. This card was inspired by the Stampin Success magazine we get as Stampin Up demonstrators and Becky Roberts, a very talented demonstrator. The chalkboard look is in and I love the look.

I am getting ready to launch my ETSY site...this card will be on there. Stay tuned for details.

EXCITING NEWS! Stampin Up is launching a new Kit of the Month program called MyPaperPumkin. Subscribers will receive a kit in the mail every month for $19.95 ( including shipping) with all supplies needed toto make beautiful paper projects. Sign up at MyPaperPumkin.com and please make sure to select me as your demonstrator.

Thursday, March 1, 2012

Everyday Enchantment Card Set


One of the reasons I became a SU demonstrator was because I had a friend (now my upline) that always made and gave the most beautiful handstamped gifts.  Before I joined she gave me a little box filled with 3x3 mini cards.  I loved it!  I have been searching ever since for the template on how to recreate it.  I never found it, but used the little box (from 5 years ago!) to figure out the measurements.  Here it is!- with the new Everyday Enchantment DSP that as you know I LOVE! 

If you want to make it here is the recipe and instructions. 


To Make Box:

Use 8x11 sheet of cardstock
·        On long side, score at: ½”, 4 “ , 5 ¾” , 9 ¼ “

·        On short side, score at: 1, 2 ¾ “ , 6 ¼ “
For best results, use sticky tape to glue box together.


Recipe for Everyday Enchantment Box and Set of Mini Cards

Ink: Pool Party, Early Expresso

Stamps: Just Believe, Elementary Elegance, Kindness Matters

Paper: Soft Suede, Pool Party, Very Vanilla, Everyday Enchantment DSP

Accessories:  1 3/8 circle punch, scallop circle punch, SU mini envelopes, Pool Party ribbon, Velcro dots (not SU)

Helpful Tools: Simply Scored